
If you are interested in building free standing wooden steps for your home, you should know how to do it right. There are several important things that you must consider when constructing this type of stair. Among these are the stair stringers that you will be using, as well as the handrails that you will be adding.
Precut, notched stair stringers
Stair stringers play a critical role in the safety and stability of a stairway. They can be built with a variety of different materials. Depending on your needs, you can choose engineered wood, solid hardwood, or a combination of materials. The type of material you choose will depend on the look you want and how functional the stairs will be.
Most stair codes require a minimum of 10 inches of tread depth. In addition, the height of the treads must be consistent across the whole stair. This enables a stair user to maintain their rhythm.
A typical wood-framed stairway will have a total of 15 risers. These can be made from either a solid or a cut stringer. Often, the stringers are made from 2x12s. However, some types of stair stringers are sistered with 2x4s.
Precut, notched stair stringers are available at home improvement stores. These stringers are typically cut to fit a standard 11-inch wide tread. Some are also cut to accommodate 7-inch rises.
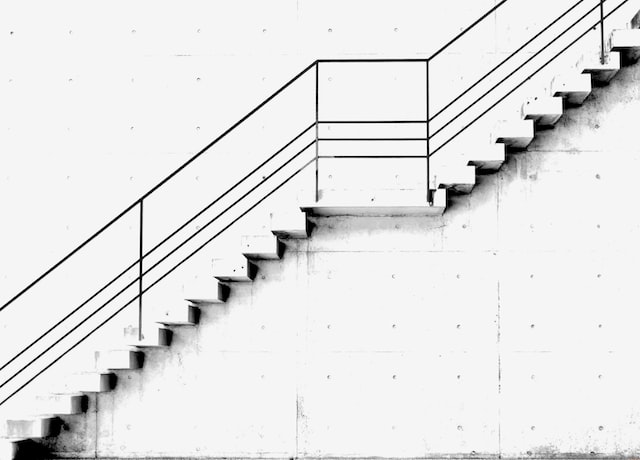
Photo by Freysteinn G. Jonsson on Unsplash
Layout and cut stair stringers
When it comes to stair stringers for free standing wooden steps, it’s important to have a basic understanding of how to layout and cut the stringers to the correct height and length. The proper measurement of the stringers will ensure a strong, durable stair.
The first step in calculating the length of a stringer is to measure the total height of the stair. This is referred to as the rise and run. In addition, the thickness of the tread must be measured.
Once you have the rise and run measurements, use a carpenter’s square to mark each stringer. If possible, try to use a straight wood strip as a framing square guide. It will be easier to cut the strings after you have drawn the cuts.
Make sure that the height of the stair stringers is level and plumb. If the stringers are not plumb, they may need to be gang-cut or adjusted.
You can also shorten the height of the stringer spans by using knee walls. But be careful of the depth of the run. Deeper runs are more susceptible to breaking and bending.
Assemble the stair parts
If you are planning to assemble the stair parts for free standing wooden steps, you will need a few basic tools. First, you will need a carpenter’s square. To get started, position the square with the side of the lumber at the height you want the stair treads to be. Next, draw a line to mark the shortest distance between the two points.
Next, use the carpenter’s square to measure the height of the risers. The stair risers will be 7-1/2 inches wide, so you will need to cut them to the proper length. You can also buy risers in custom sizes.
After you have cut the risers to the correct length, you can use a circular saw to cut the stringers. Each stringer is typically 2 x 12 inches, so they will be fairly thick.
Once the stringers are cut, you can install them. They should be secured with 2.5 in (6.4 cm) screws.

Photo by Jean-Philippe Delberghe on Unsplash
Add handrails
If you want to add handrails to free standing wooden steps, you will need to follow a few simple steps. These steps will help you ensure that your stairs are safe and secure.
First, you will need to measure the area you want to add handrails to. This will allow you to estimate the right height of your railing. You should also allow for about two inches of overhang.
Next, you will need to decide how long you want your railing to be. The length of your railing will be dependent on the brackets you use.
Typically, brackets come in two sizes. If you will be installing a single railing, you should buy a smaller size. Alternatively, if you plan on installing a double railing, you will need to purchase a larger size.
Once you have your brackets, you will need to drill pilot holes for the screws. You should also use a stud finder to locate studs on the wall.